First DIY Project, Useful Cup Holder for the Couch
This is the first DIY (Do It Yourself) project I’ve done for my blog. As I’ve been moving towards home ownership, I’ve been enamored by Pinterest and all of the projects I’d like to take on at the home I’d like to buy. Actually, I’ve completed a purchase and sale agreement with the owner and the paperwork is being process by the bank. You can see the home posted for sale by owner on Zillow at 1119 W Irving Street. It’s a pretty amazing house. I’m sure in a month or two we will be inviting friends over for a house warming party (no need to bring stuff). While the home is pretty well done, it sounds exciting for the moment to think about personalizing the house. Who knows if that’s how I’ll feel in a year, but for now it’s fun to think fondly about weekends spent working on my home.
That being said, I worked on my first DIY project, even though we are still living with Minnie’s dad. The idea actually came from visiting my mom a couple of weekends ago. She recently got a brand new couch. It’s really nice, one of those two seater couches with an armrest / cup holder in the middle of them and lazy boy’s on either side. I noticed that both of them had placed coasters over the cup holders, due to their glasses being too large to fit into the cup holder. I found myself worrying that the coasters would move. I thought about pasting something to the coaster bottom that fits snuggly into the cup holder, and then no worries about the coaster moving.
You can see the problem first hand below
 The built in cup holders for Minnie’s dad’s couch, for my DIY Project that I posted on my blog, First DIY Project, Useful Cup Holder for the Couch.
I decided to go out to Good Will and found a set of three clear glass coasters. Initially I didn’t want clear glass coasters, but I was limited to what I could find in the thrift store in Sunny Side. They cost about $0.99, so pretty inexpensive. I also picked up some guerrilla glue and some a box of canning lids from the store. All together under $5.00. The picture displays that I bought the complete set of canning lids, but I ended up using only the circular inside section which you could purchase for cheaper. It had been my plan to use the outer ring as the piece, but I found that having bought the wide mouth lids, it didn’t fit into the cup holders. I tried to cut them down, but found I didn’t have any sufficient tools to do the job. The inserts were the perfect size, and it turned out looking better then I had thought. Below are the utensils used.
 Below are the various items used for my coaster cup holder DIY Project that you can read about at First DIY Project, Useful Cup Holder for the Couch . It is a photo of canning lids, gorilla glue, and coasters purchased at Good Will.
It was pretty simple, once I decided to use the canning lids inserts (the flat round pieces). Basically I just glued them to each other with plenty of gorilla glue and then I glued it on the bottom of the coaster. You can see the final product below.
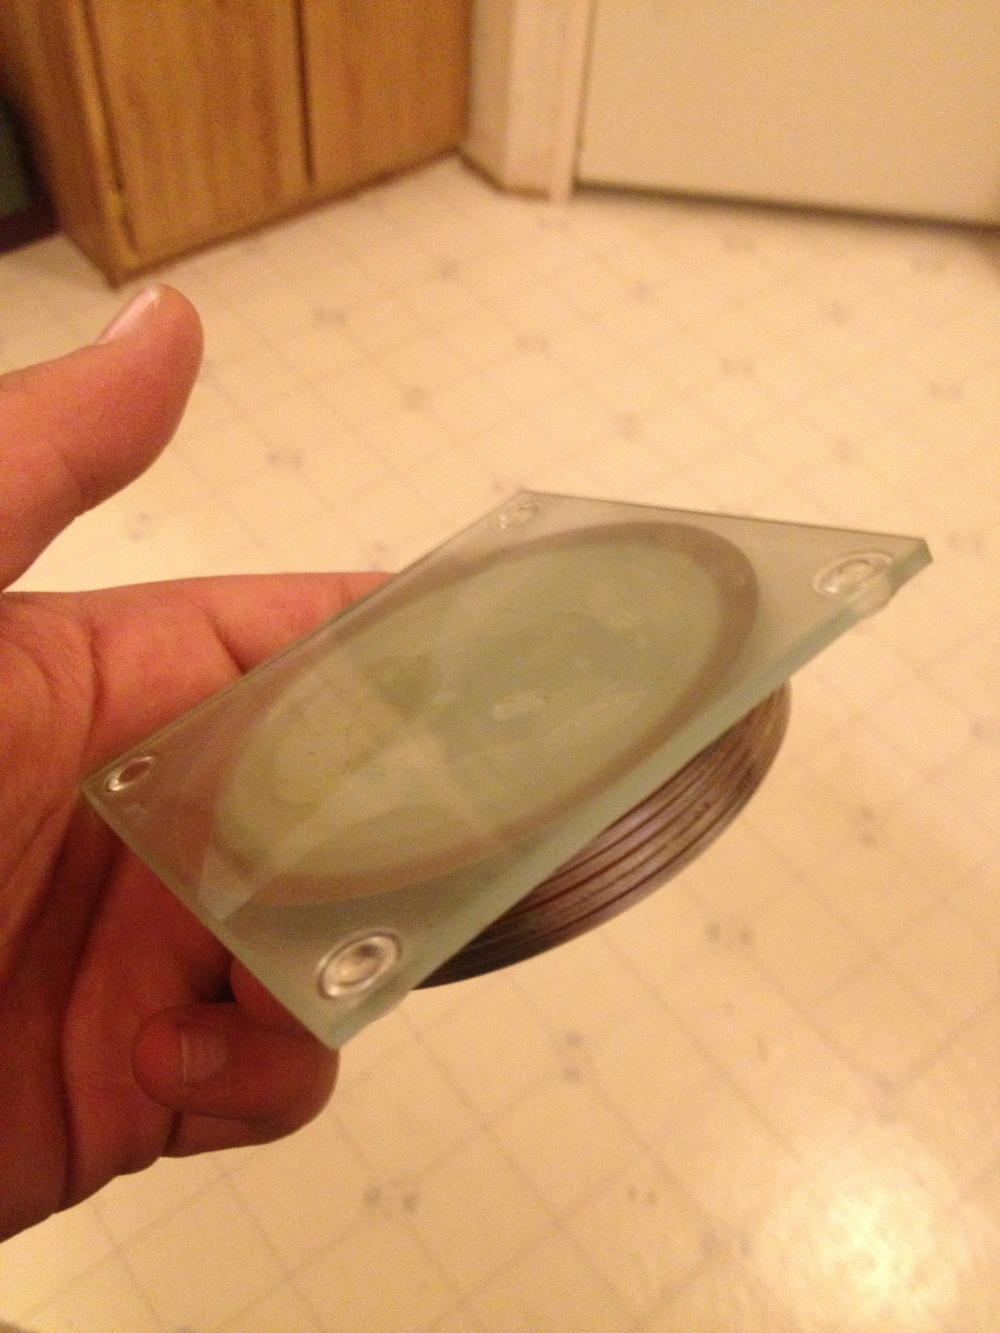 The final product of my DIY Project that I wrote about on my blog, at First DIY Project, Useful Cup Holder for the Couch . A photo of a thrift store bought coaster with canning lid inserts gorilla glued to the bottom. Works pretty great!
Just for fun, also check out the YouTube Video of MACKLEMORE & RYAN LEWIS - THRIFT SHOP FEAT. WANZ (OFFICIAL VIDEO) thinking about Good Will.